For centre owners · your first live session

From sign-up to student work on screen.

Set up one pilot student first. In about 15 minutes, they can be writing on an iPad while you follow every step from the Classroom Monitor.

✓ About 15 minutes of owner setup
Before you start

Set these beside you.

You only need one pilot setup—not your whole centre roster.

A laptop or desktop

For the centre dashboard, Scheduler, and Classroom Monitor.

One student iPad

iPad 7th generation or newer is preferred, with a compatible stylus.

One pilot student

Their name, grade, and a simple username and password.

01

Create your centre account

Choose “I run a tutoring centre”, then enter your centre name, your name, work email, and password. Your 30-day trial starts without a credit card.

About 2 minutes
02

Add one pilot student

After sign-up, the setup checklist opens automatically. Add one student with their name, username, password, and current grade. PrepBox creates the matching current-grade baseline in the same step. Save the sign-in details before leaving the page.

About 2 minutes

Keep the rehearsal small: add the rest of the roster only after this student completes the full route.

03

Confirm the student’s starting point

Open Student Lookup and choose your pilot student. Their current-grade baseline is already assigned. Use Assign Diagnostic only when you deliberately want to change an untouched baseline to one grade below.

About 2 minutes

The baseline is filed inside the student’s Math course. Changing an untouched baseline does not change their saved grade.

04

Create the first class

Open the Scheduler, create a timeslot, then open it and assign your pilot student. The class now connects the student, the time, and the live teaching room.

About 4 minutes

For the rehearsal, one timeslot is enough. You can build the recurring schedule after the workflow feels familiar.

05

Start the diagnostic on iPad

Download PrepBox2 on the student iPad. Sign in with the username and password from step 2, open the assigned diagnostic, and have the student write the first answer.

About 3 minutes to sign in

Use the same iPad and stylus setup students will use in real sessions. This catches hardware or sign-in issues before launch day.

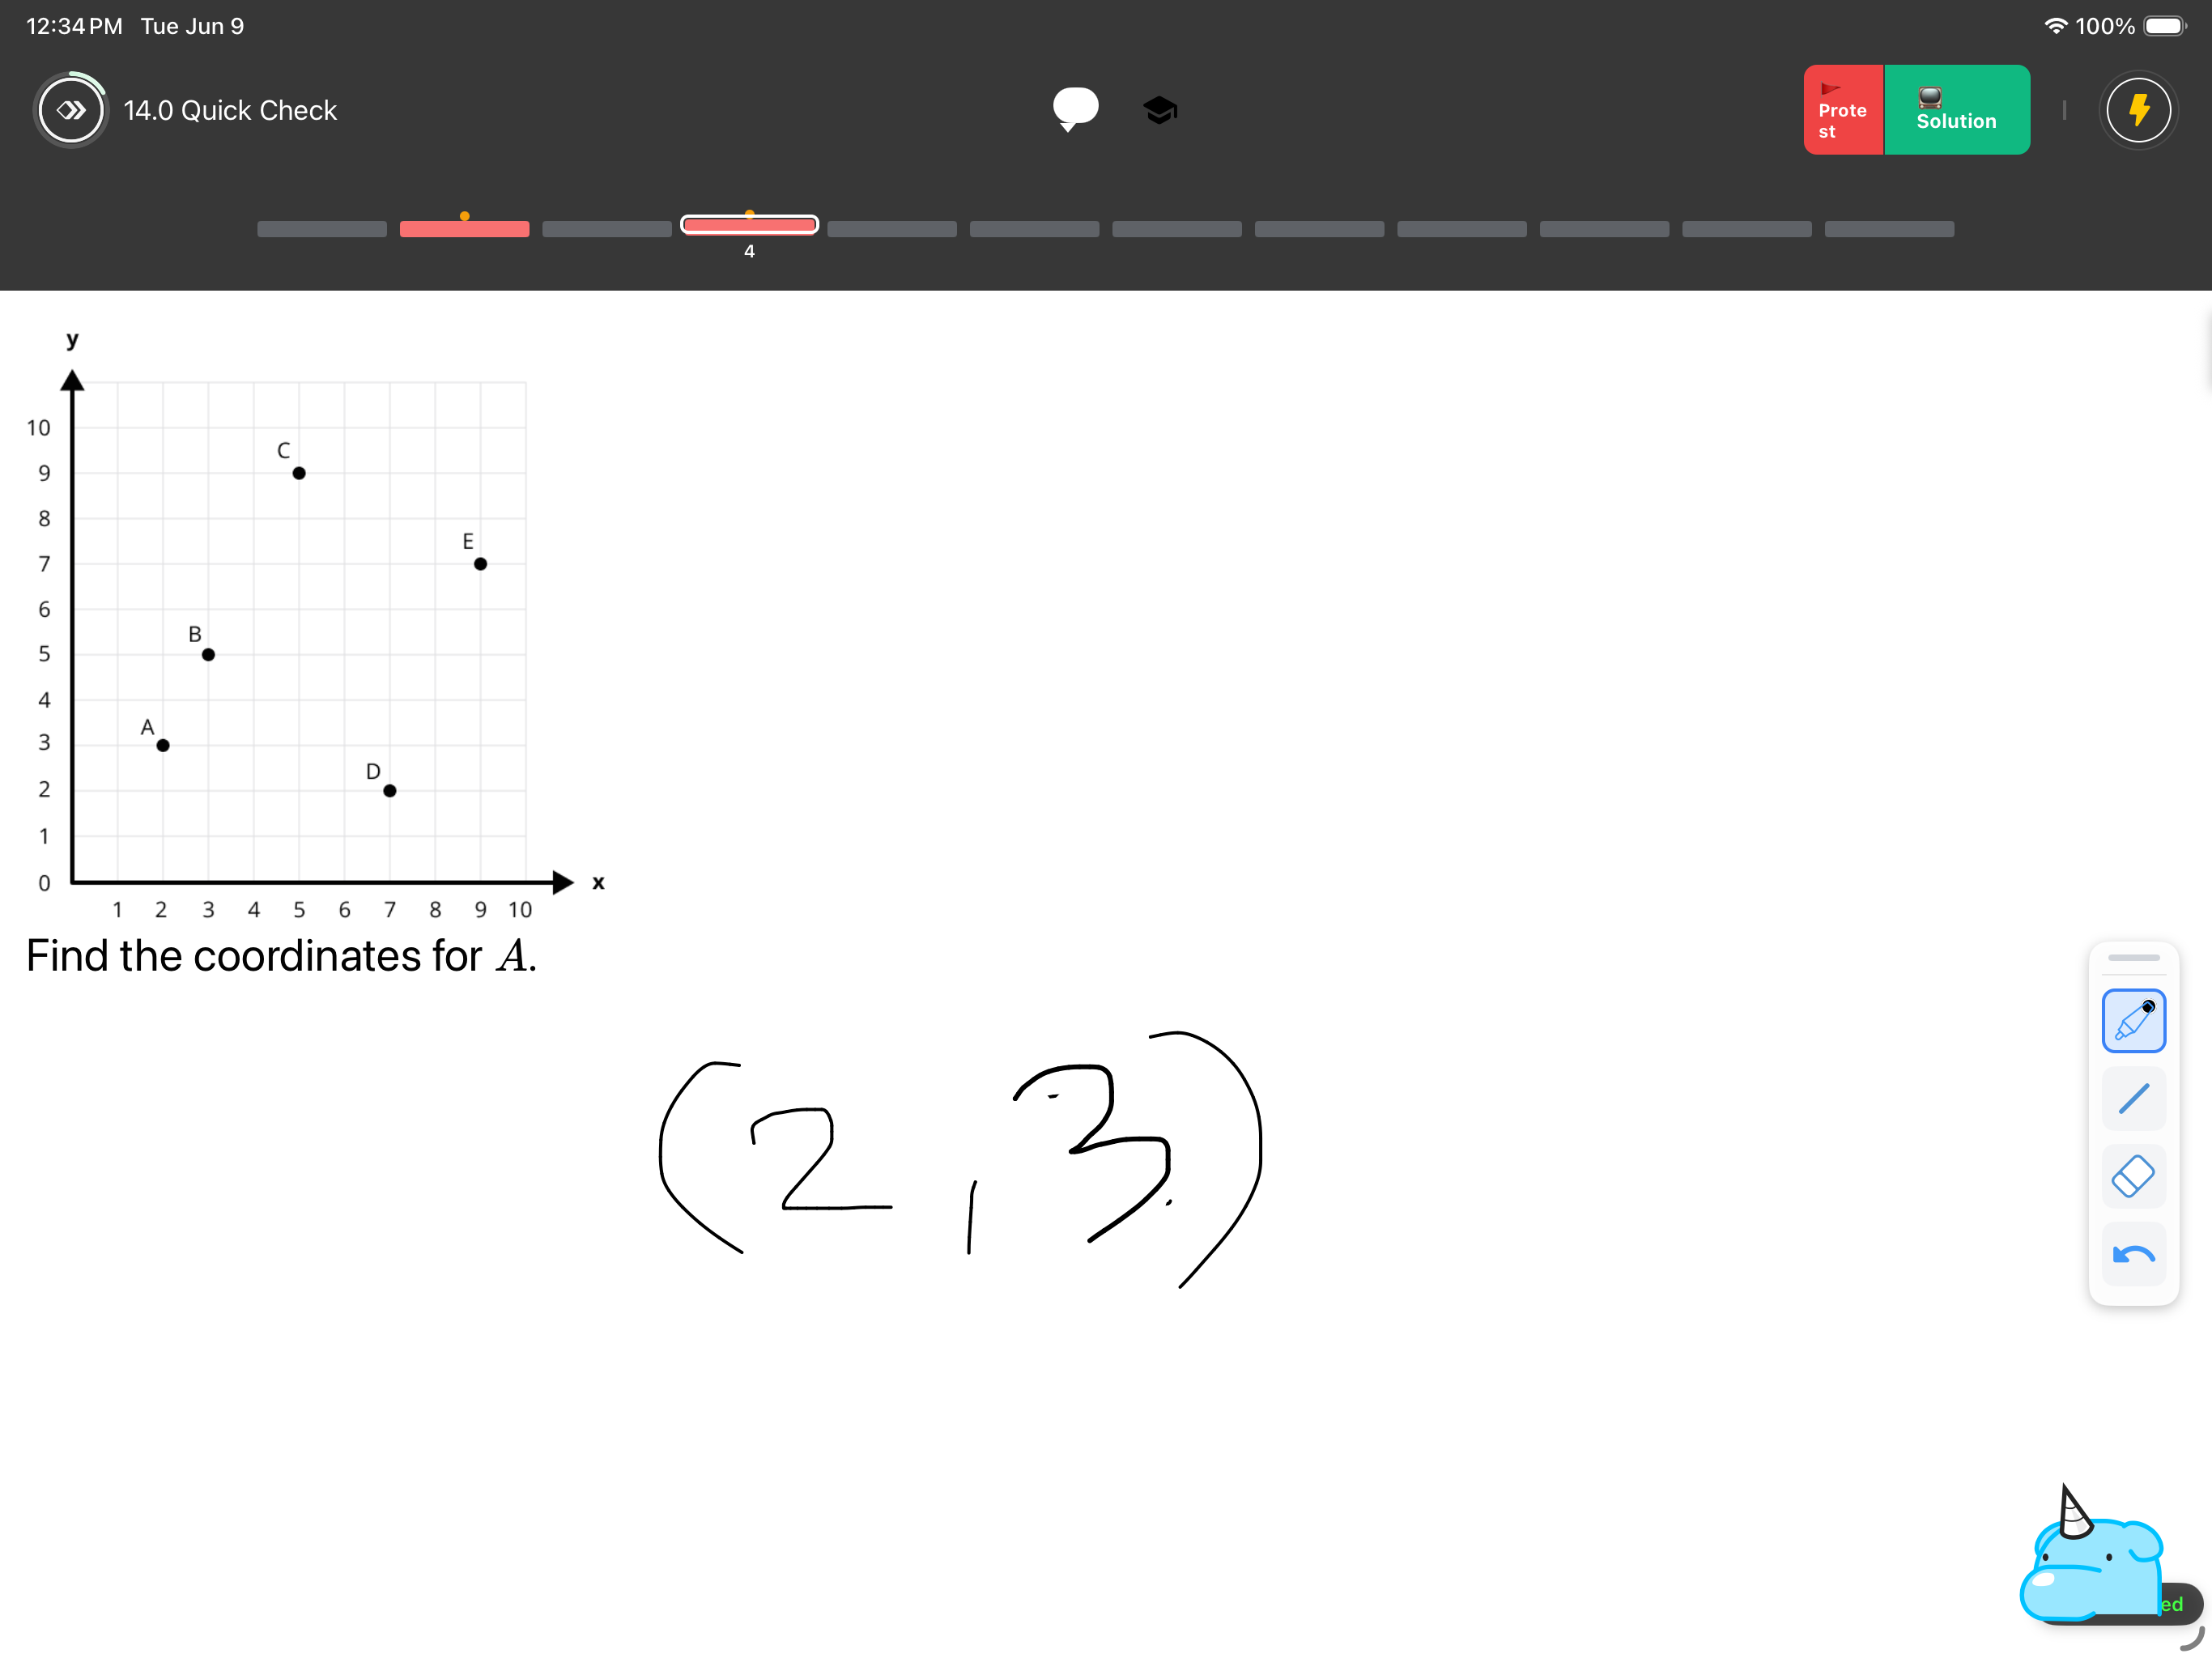
Actual PrepBox2 iPad question workspace showing a coordinate-grid question and the student's handwritten answer
Actual PrepBox2 iPad workspace. The assigned diagnostic uses this same question, handwriting, and submission screen. Simulator capture · sample question
06

See the first work arrive live

Return to the Scheduler, open the timeslot, and choose Enter Session. The Classroom Monitor is your teaching desk: watch the student write, receive the submission, and review it from the same screen.

Your activation moment

You are ready to expand when: the student writes on the iPad and the same work appears in your Classroom Monitor.

Classroom Monitor · real anonymized session demo
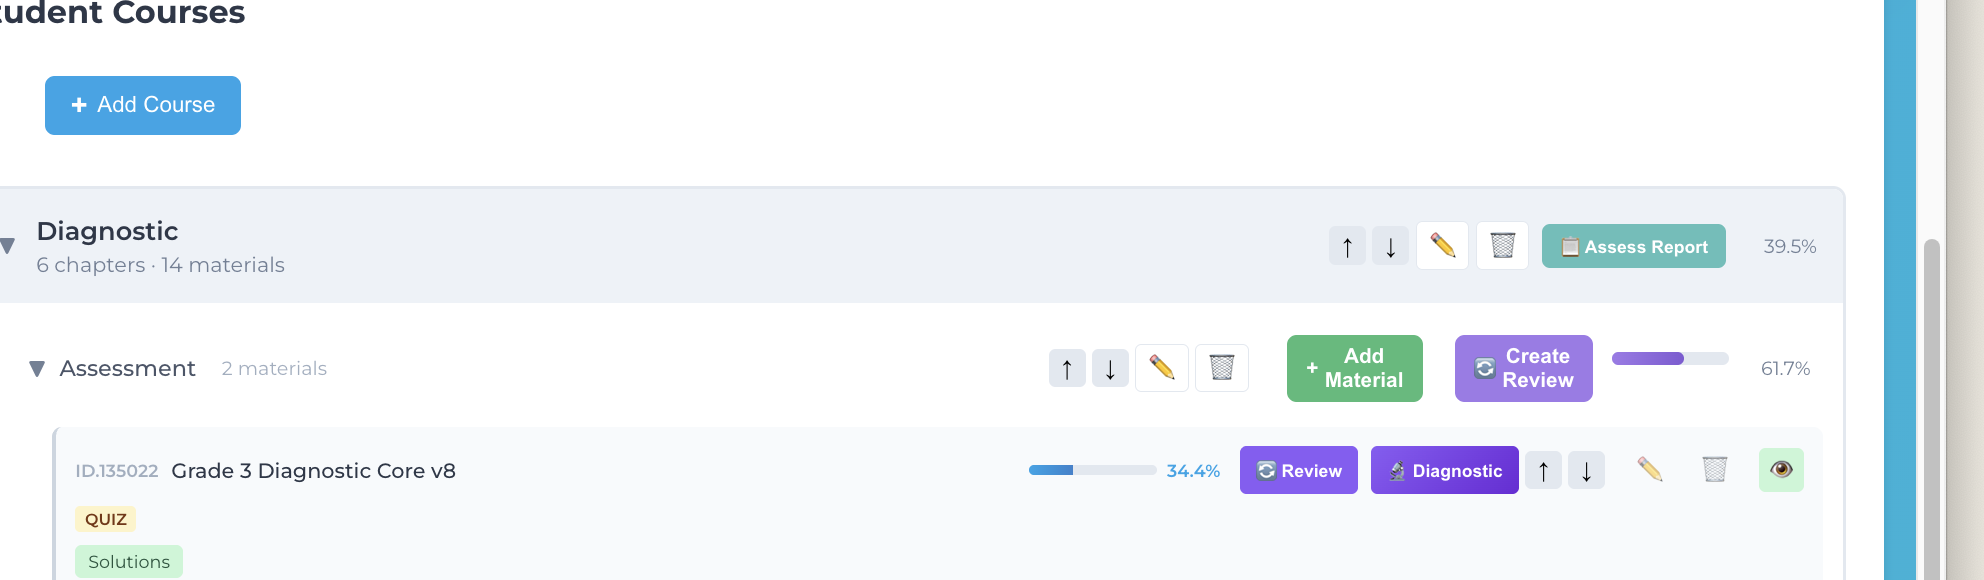
Actual Student Admin screen showing the Diagnostic course, teal Assess Report button in the course header, and purple Diagnostic button beside the completed diagnostic material
1Purple Diagnostic: analyze the finished assessment and create the next materials. 2Teal Assess Report: create the parent report and tutor briefing. Actual Student Admin screen

First submission visible? Now expand the centre.

The system is proven on your actual devices. Everything that follows is repetition, not a new workflow.

Team

Invite your tutors

Send each tutor their own invitation from the centre dashboard. They can use the same Scheduler and Classroom Monitor.

Roster

Add the remaining students

Create the rest of the student sign-ins. Each supported grade receives its matching baseline automatically.

Repeat the cycle

Teach from the new plan

The assigned weekly materials now appear in the student’s selected course. Complete the work, review the evidence, and prepare the following cycle.

Stuck before the first submission?

Email me directly. I built PrepBox inside my own tutoring centre. — Min

Email Min Create my centre →